-Use this option if the builder or address has never been added to the system before. You
only do this once for a new job.
– This is not how you add a new task to the schedule.
Watch it in Action
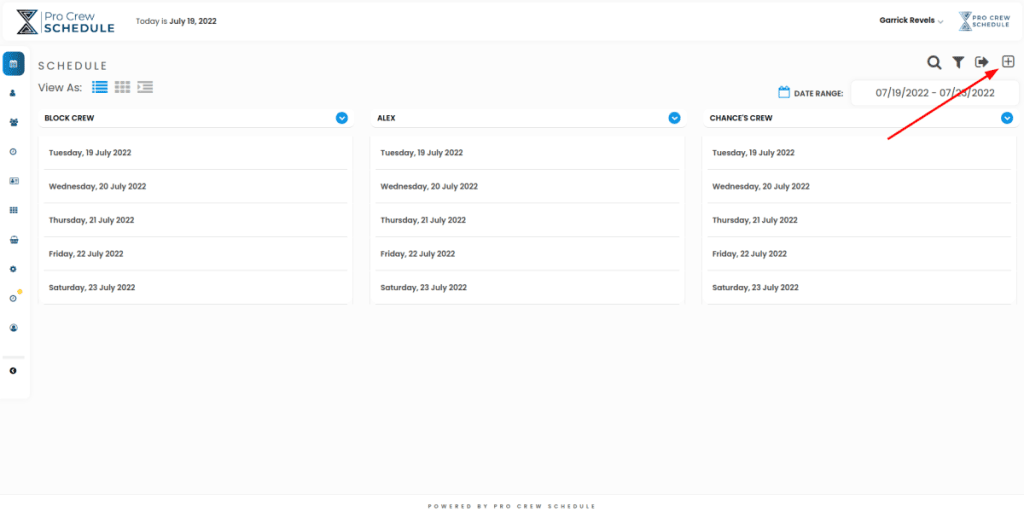
Step #1 Click on Add Schedule (Red Box)

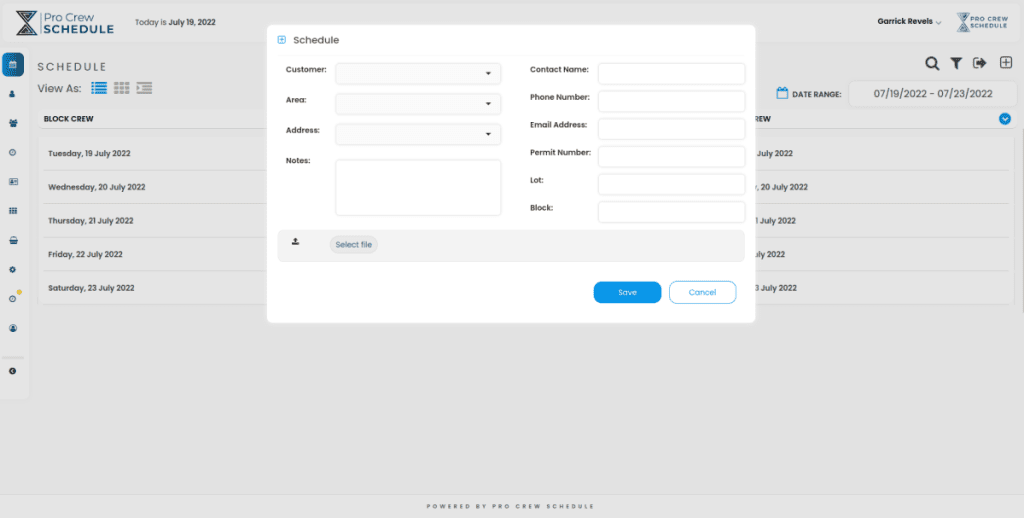
Step #2 Fill out the pop-up from with all the new information

Builder – This is for the builders name. You can store multiple address under the same builder, I have 100’s of different address (jobs) for the same builder.
Subdivision – If the job is inside a community or give it a nickname for quick reference in the future. You can also have multiple address (jobs) inside the same subdivision
Address – Address of the job
Lot & Block – Used as another quick reference. A lot of planed community have Lots and Blocks as a location reference. I can also input NA or 0 if there no lot and block used.
Contact Name – The contact name of the person for this job
Model – Model name of the house your building
Elevation – This can be used if the builder use different front elevations for the same model home of it can be used as a measurement above sea leave
Permit Number – Permit number for the issuing city or county. We use this for quick reference when calling in inspections.
Notes – This set of notes carry along with every tasked scheduled for the job. We use it for mater notes for this job.
Attach Files – You can attach most files here, blue prints, plot plans or any documentation that you off or crew would need to complete the job. We attach completed job site pictures for future reference here.
Once you have filled in all the information click Save and you’re done. You will schedule a task
for this address in a different screen.


